Rocketbook Panda Planner for work/life/study productivity

This post introduces the Rocketbook Panda Planner, a new tool I’ve been trying to help manage my work/life/study. When I first returned to work from parental leave, I needed to get my head back into the world of work. I’d tried lots of different tools to keep myself focused and help me plan and prioritise my weeks and days. For the most part, I had something that worked. However, I had to acknowledge I needed something different now I am a father to three! Something that would help me plan life — with the perspectives of fatherhood and a busy career.

I’d decided I wanted something handwritten as opposed to something digital. Mobile phones, tablets and laptops are doorways to a world of distractions. I knew that if I used an app, I would inevitably get distracted by the many other things in my devices. Probably email or Twitter — the two usual culprits.

So! I needed something to motivate, plan and prioritise. Plus it must be ‘paper-based’.

Introducing the Rocketbook Panda Planner

The Rocketbook comes with a high quality microfibre cloth and Pilot Frixion pen.
My newly unboxed Panda Planner

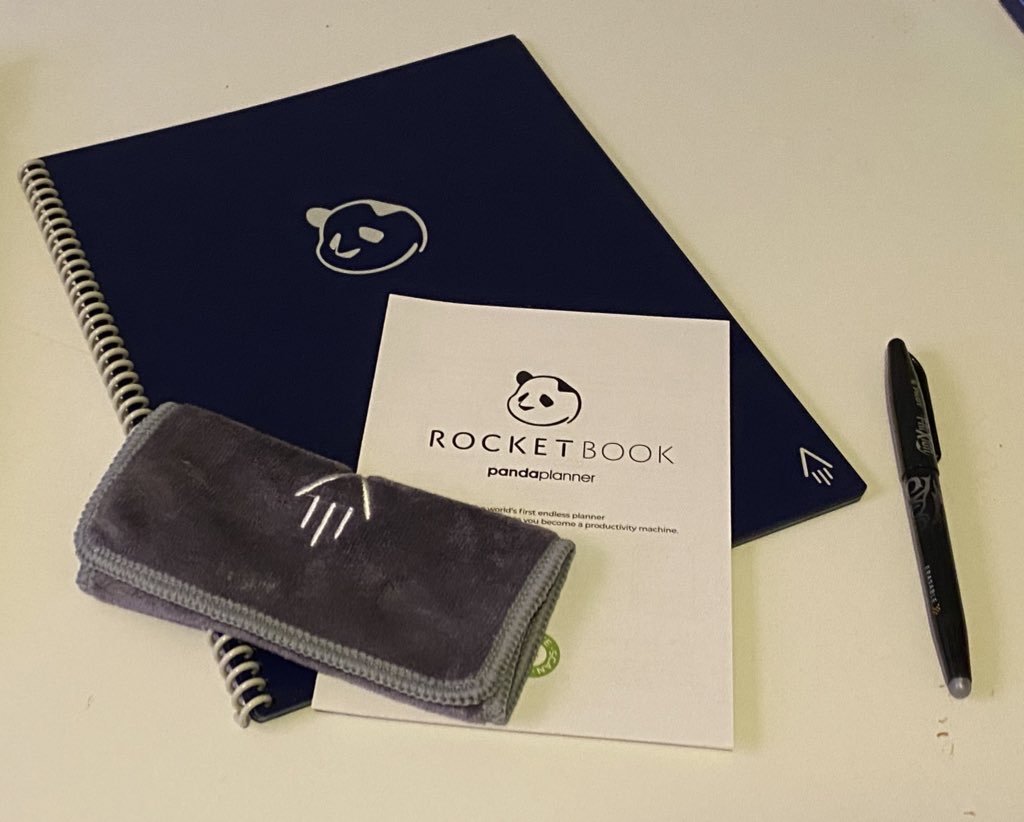
After some research, I came across the Rocketbook Panda Planner. Described as a planner for ‘those who want an endlessly reusable planner to last for years, if not a lifetime. The Rocketbook Panda Planner gets you organised so you can focus and hit your goals.’ That sounded just like what I needed.

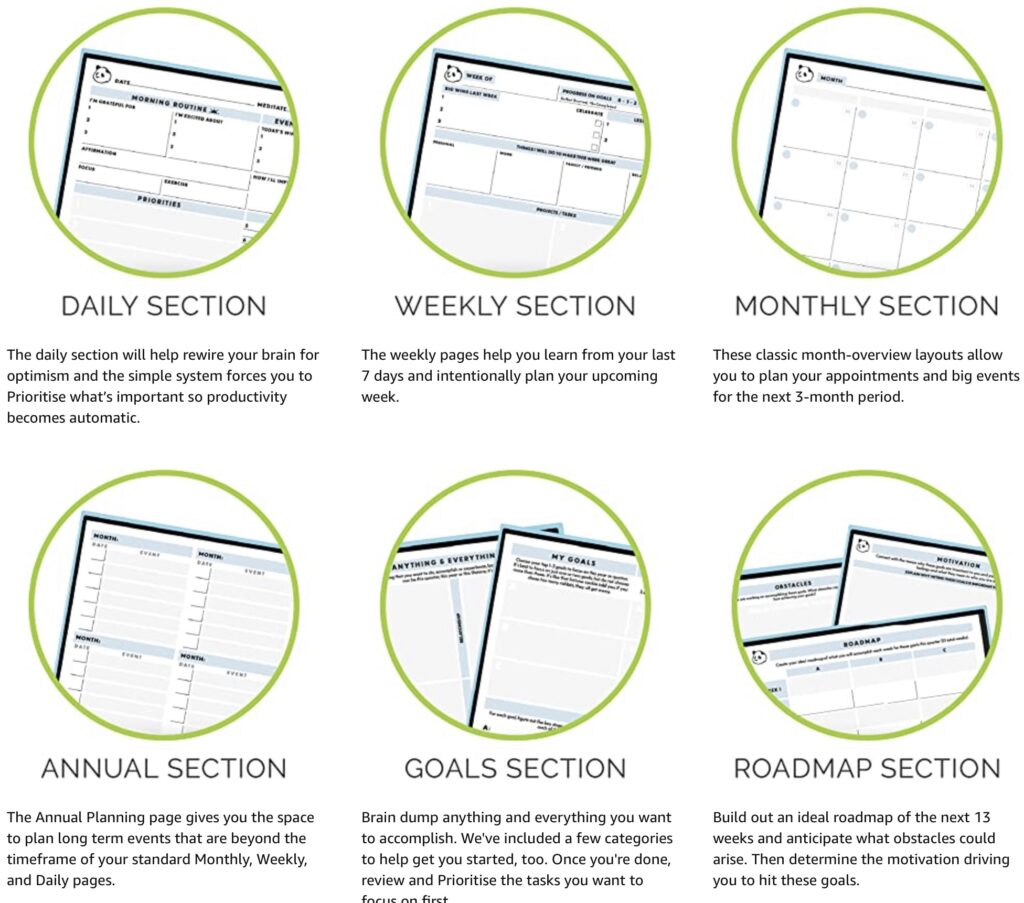
The planner is split into a number of different page types to help you plan:

The Rocketbook Panda Planner has a number of sections to help you organise yourself.
Panda Planner page types

More importantly – it is reusable. I’d never considered a ‘re-usable’ notebook (and wasn’t aware they existed). It is however a fantastic idea. The entire book is essentially wipe clean. It’s a bit like a whiteboard meeting a book. This means there is no guilt from having another diary that will end up in a recycling bin. The real selling point of this wasn’t clear until I actually used it. The beautifully therapeutic moment you wipe away days and weeks of plans, achievements and reflections (there is an app to help you retain a digital copy).

Rocketbook allows you to write and organise your work before scanning it into the app and then wiping the book clean for reuse.
The Rocketbook process

Using the Rocketbook Panda Planner

I very much enjoyed the process of using the Panda Planner. I first worked through the goals and roadmap sections to plan the next quarter (3 months). I set out a number of ambitious work, research and personal goals. It also gave me a valuable opportunity to reflect on potential barriers. Here I noted that my three little ones may become barriers to progress – but it also helped me concretely write that it didn’t matter. As a parent – I needed to juggle that new balance and the Panda Planner helped me navigate this. It was helpful to pen some of this down and get to grips with my life’s new priorities. I am, perhaps, guilty of focusing on work too much – and the Panda Planner helped me bring some balance to that.

With the quarter prepared, I then moved towards weekly and daily sections. I particularly liked how they provided opportunity to undertake routines as part of the day. The daily planner (below) starts off asking what you are grateful for, and excited about — three items for each list. It also provided space for a daily affirmation. Not something I’d usually go for, but with three adopted children moving in, I was writing ‘I can do this’ a fair bit. For the evening is an opportunity to reflect on the day. Here you can record the wins for the day and take note of any opportunities to improve. The rest of the page is very much what you’d expect of a daily planner: priorities, schedule, tasks and notes.

The layout of a daily page

What I’m using

I’d recommend giving the Rocketbook Panda Planner a go. I’ve since expanded to utilise a standard Rocketbook for my general notes. You can write on them with any of the Pilot Frixion line of pens and markers. I’ve found the Frixion fineliners much better than the rollerball ones as they put less pressure on the Rocketbook pages. I think this has to work in favour of longevity.

How to mindmap a keynote or lecture

I’ve recently just made it back home from a conference. While I was there, I mind mapped the keynotes – something I have done at previous events. I received some really nice feedback on these and thought it would be nice to write up a quick guide of how to do it!

The first thing you need to do is decide on a medium. While you can hand draw them, you generally need a very big sheet of paper – so unless you’ve got a wall to hand, software if your best bet. There are LOADS of mind mapping tools, both free and paid for. Biggerplate has a ranked list of mind mapping software on their website. I personally use iMindMap. While most software has a broadly similar feature set, I feel iMindMap has a couple of unique modes. Most importantly, I think the maps it produces are the most aesthetically pleasing. If you’re going to do this – it may as well by pretty!

If you go digital, you’ll probably find it faster if you have access to a keyboard. This can either be a laptop, or a tablet with keyboard cover or bluetooth keyboard.

Practice the method

No matter what tool you are using, paper or software – you must practice. You need to be very confident with the process of creating a mindmap, especially when you are doing this for a keynote or lecture. This is because you need to be fast. If you’re not used to the software or the process, your notes will be slow and the mindmap will hinder your notes – not help them.

I think mind mapping from existing notes or book chapters is an excellent place to start. If you are using software, it will help you with the map format. If you are going hand-drawn, the iMindMap website has a great page on the technique and a fully detailed PDF guide that goes into the science. Still – I recommend the software!

At some point you need to practice mind mapping a live event. It’s best to do this for something recorded or something that doesn’t really matter. As this is your first event based map – you may miss some points or not be as quick as you need. Don’t rely on this approach until you’re confident with it!

Practice with the software is particularly important. They all tend to be pretty intuitive, but it is best to practice capturing at speed.


Mind mapping a live event

This bit assumes you are confident with mapping:

When you are mind mapping an event, you need to focus on getting everything down. You should try and make sure you get things into the correct hierarchy and tree – but don’t worry if you don’t quite manage this. The beauty of software is that you can copy/paste/move things around easily. If you decide to go for a paper map, you may need to make a tidier version once you’ve finished.

Don’t worry too much about the overall structure. As your map grows through the event you will get a better idea of the more important elements. Then you can begin to re-order things as you go. If your software supports multiple ‘central ideas’, or concept mapping, it may be easier to split/move your tree around afterwards.

Whatever you do – do not focus on branch shaping and location. Let your map be messy! At the end of the event you can reshape everything and move it to where it needs to be. Do not let this distract you from capture as you can only do that in the event. Smartening things up is a job for later.

You will find most software has an automatic structuring feature, snapping feature or ‘clean up’ feature. This will keep everything in some form of order as you go. The software I use, iMindMap has a really good clean up feature that tidies things up and makes sure everything is legible and in its own space. If you’re working from a single central idea, it also has a special capture mode that explicitly lets you focus on getting things down – and not on structure.

If you want to include images or photos in your mindmap, these can be done afterward – or as you go along. It tends to be easier to do this afterwards, but if you’re quick, it is nice to capture as you go along to ensure images are in the correct place. I do this a lot when capturing slides that I embed inside my map. As I have an iPhone and a MacBook Pro this is an easy process. I use Microsoft Office Lens to capture board pictures and then use AirDrop to send it to the MacBook and then into the software. That sounds like a fair process – but it is quite quick with practice!

As an example, here is an initial screenshot from the capture and another towards the end:

Initial version:

Final version: 

This final version is finished after the event. I spend time tweaking the branches and central ideas so everything fits. Sometimes I add in a few more links, reflections or questions to further reflect my thinking. Checking spelling and grammar comes at this point too, as does the inclusion of additional images.