A box of bricks from the LEGO BYGGLEK Set

LEGO Serious Play: The IKEA & LEGO Dream Team

This blog post discusses the possibility of the IKEA LEGO sets for LEGO Serious Play. In 2018, IKEA and LEGO announced they were going to play together. This led to the development of the BYGGLEK LEGO collection, available exclusively at IKEA stores. This product range included a series of LEGO storage boxes and a set of 201 LEGO bricks designed for free play. As described by IKEA:

Creating more space for play
The BYGGLEK LEGO® collection offers play storage solutions and a LEGO brick set unique to IKEA. The boxes easily find harmony with your home so the creations can be put on display, keeping the story alive until the next play time.

IKEA website

Having used LEGO Serious Play as an aspect of my research and work for some years, I’ve recently considered how the BYGGLEK LEGO collection can be used for LEGO Serious Play. Before I get into this, however, a brief introduction to LEGO Serious Play:

What is LEGO Serious Play?

If you’ve not used LEGO Serious Play before, it is a creative approach to meeting facilitation that uses LEGO bricks as a form of collaboration and communication. It has a track record of success across education and business – shaking up traditional meetings and learning opportunities with the use of LEGO. This has taken it beyond meetings and into the classroom and sphere of research.

Think about all the times you’ve set out Flipchart and pens – and most groups struggle to settle on a scribe – ‘You do it’ – ‘No! You!’. This doesn’t happen with LEGO Serious Play. Everyone is in! I’ve used LEGO Serious Play with participants of all ages for research, learning and business strategy purposes.

Using the LEGO Serious Play Method
Serious work: How to facilitate meetings with LEGO Serious Play Method
How to facilitate LEGO Serious Play online

IKEA and LEGO Serious Play

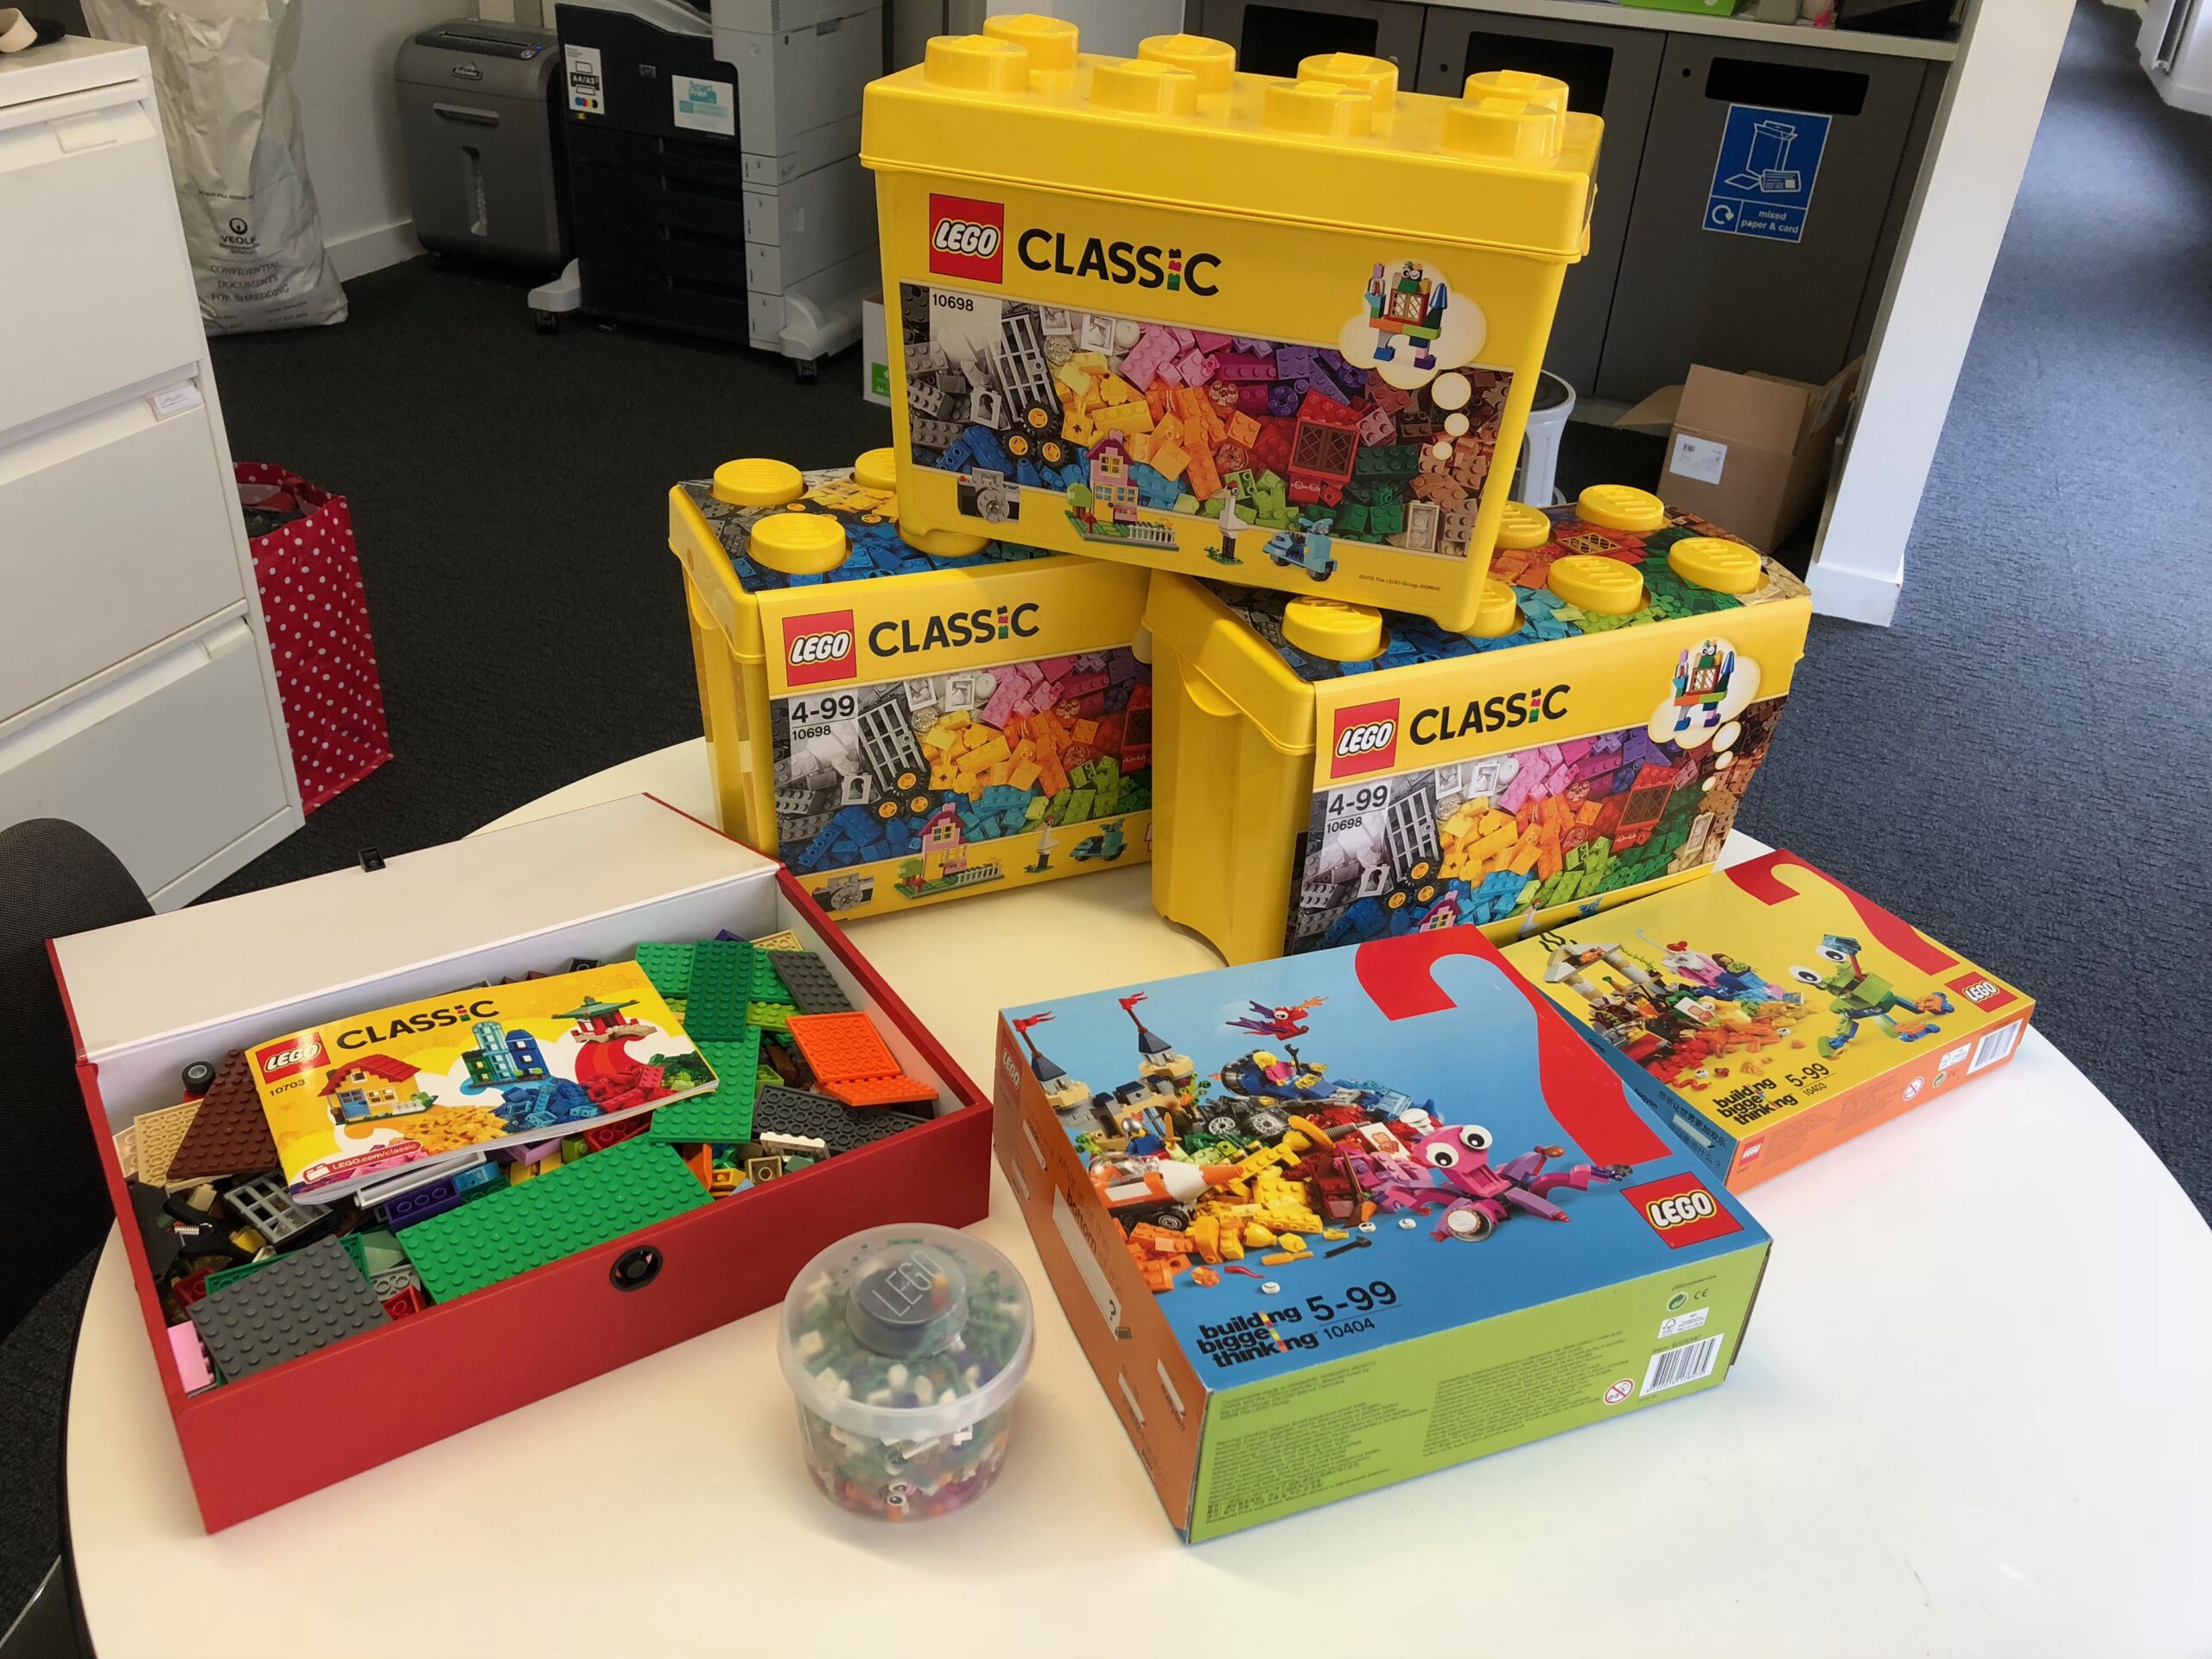
So far, my LEGO Serious Play practice has focused on a large collection of bricks that all participants share. I blogged about the sets used to build my LEGO Serious Play collection, and since 2021, that collection has been the staple of my LEGO Serious Play kit. I’ve recently wanted to explore individual LEGO Serious Play kits so each participant has their own bricks. This can reduce the scrabble for bricks between participants and reduce much of the noise in the session (something some participants can find distracting).

There is also a potential for equity. One of the LEGO Serious Play practitioners I worked with insisted on participants having the same bricks. This raises the question – what bricks to use? My colleague went to a LEGO Store and used the Pick a Brick wall to build a collection of identical sets. This has always been too risky for my liking – too reliant on the store’s stock of bricks. It’s also a bit of an administrative hassle, especially if the store is busy. Then came the BYGGLEK LEGO Set:

A photo of the BYGGLEK LEGO set - a white box features both the LEGO and IKEA logos.

Digging into the BYGGLEK set

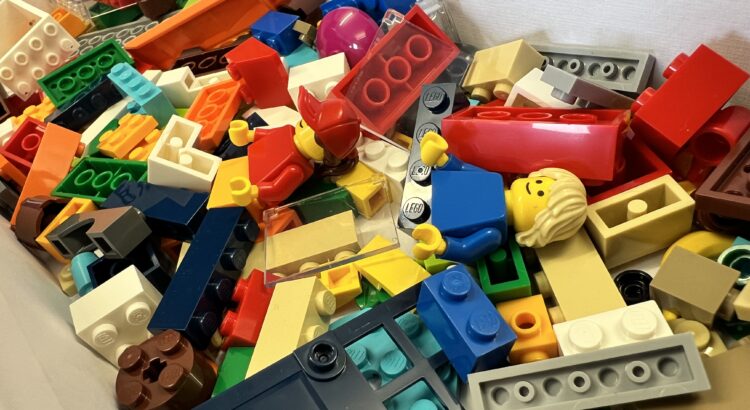
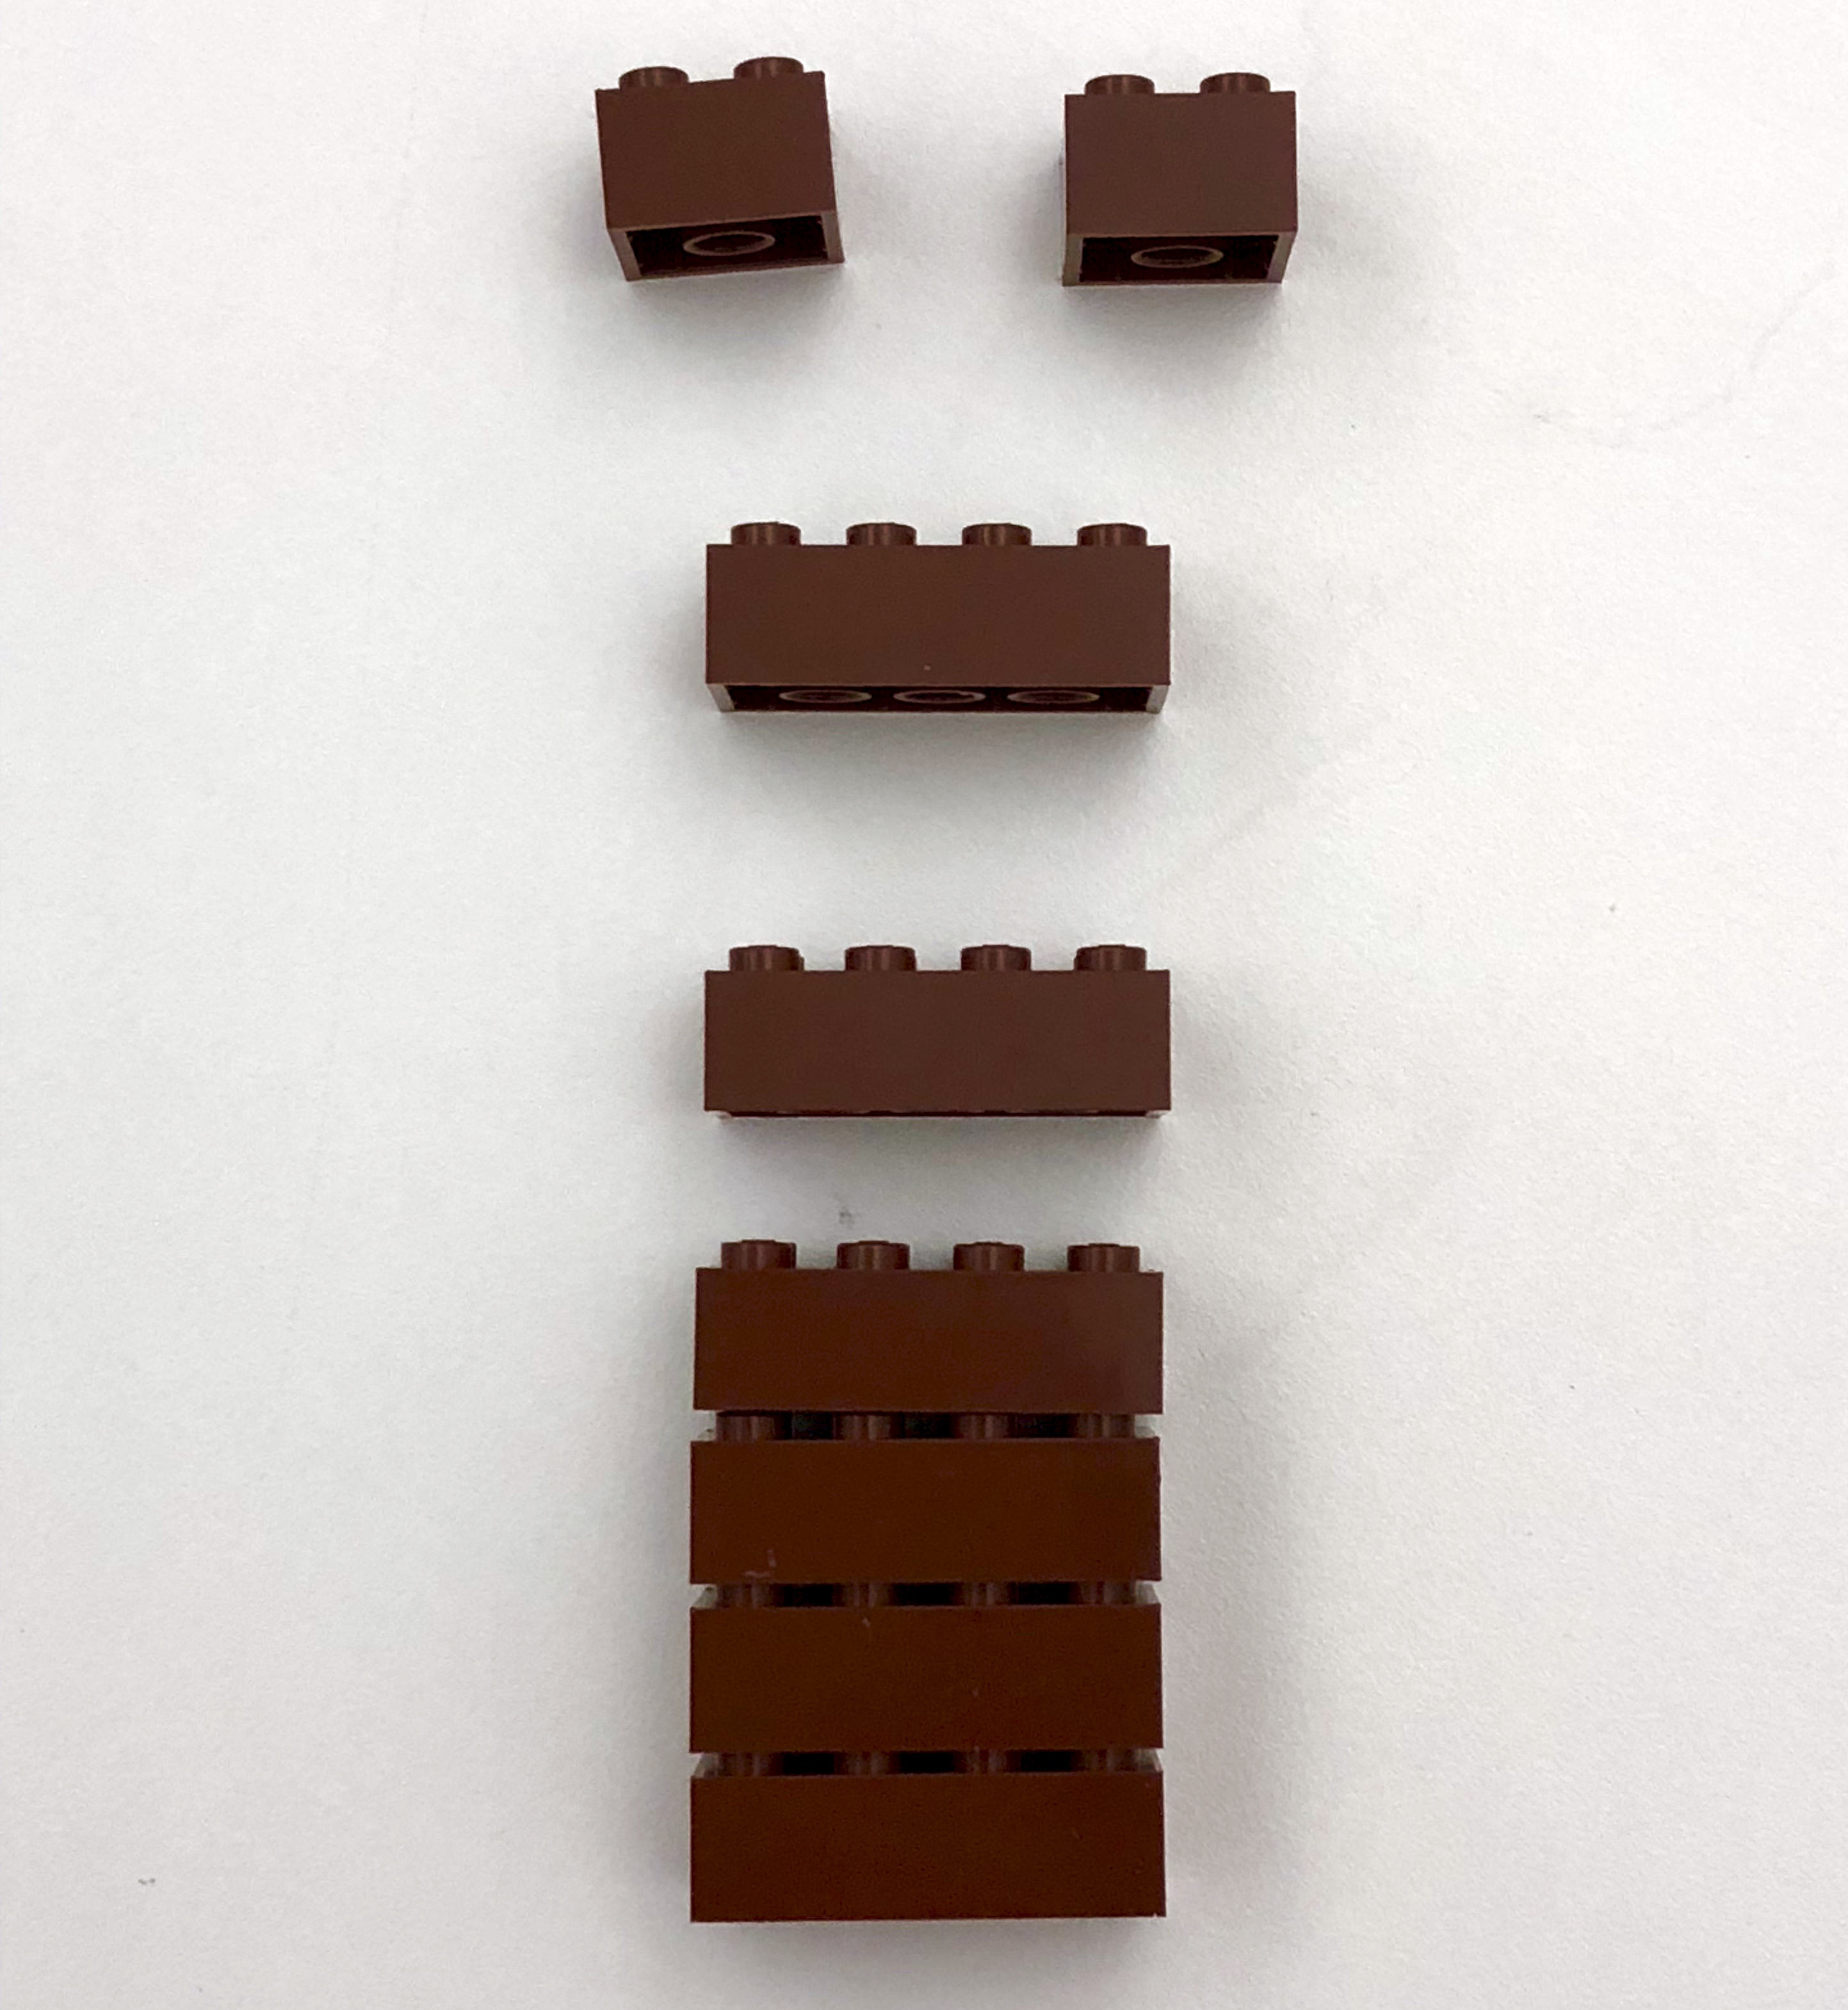
This IKEA-exclusive LEGO set contains 201 bricks, including a brick remover. Within the set there are a range of plates, bricks, a door, some windows, a range of small bricks and enough parts for two Minifigures. As I’ve come to get to know this set in closer detail, I’ve become more convinced it’s a perfect range for LEGO Serious Play. It has a really nice range of bricks, allowing participants to communicate a whole range of ideas. So you can get an idea, I’ve laid out the bricks in this box below:

A box full of the BYGGLEK LEGO set to demonstrate how it could be used for LEGO Serious Play.

At 201 bricks, it feels a really nice size for individual use. I love the variety of bricks included in the set. There is a handful of regular bricks, but the body of the set includes a variety of brick colours and sizes. It has some nice, intricate details. I love the inclusion of some leaves and green elements alongside some food pieces, windows and a door.

Just the right size and configuration

This catalogue image unintentionally shows some potential LEGO Serious Play uses for the set.

This catalogue image gives you a good idea of the scale of the set – or the scale of the models that can be built with it. It isn’t enough LEGO to make the larger, more dramatic models – but it’s good enough for some detailed and intricate models (which is my favourite kind – every brick has meaning. The two Minifigures are nice and echo the days of plainer characters, a contrast to a lot of the licensed figures that dominate now.

While there is debate over using Minifigures for LEGO Serious Play, I’ve always included them in my sets. Yes – it can funnel participant responses around more concrete than the metaphorical use of LEGO, it can also enable the metaphorical messages. I’ve had too many participants wasting time building something to represent people or a person. Minifigures just cut straight to it! As mentioned above, the plainness of these figures also stops the message from getting conflated with a licensed character.

Keeping things tidy – the BYGGLEK Storage boxes

IKEA brought their famed trend to the BYGGLEK collection – flat-pack LEGO! Yes! They’ve managed to create flat-pack LEGO in a way only IKEA could. The BYGGLEK collection includes four different sizes of LEGO storage box. The two smaller sizes are fully assembled and come in a box of three (one small box, two extra small boxes). The two larger size boxes are the ones requiring assembly. It’s a tool-less construction, and the pieces click well together to create a solid box, perfect for storing LEGO. More importantly, the box lids double as LEGO base plates. The boxes themselves can also be used as part of the build, and the larger boxes have LEGO-compatible recesses.

The BYGGLEK Storage box

So – back to LEGO Serious Play! The medium-size BYGGLEK box (26x18x12 cm) is great for storing those individual LEGO Serious Play kits. The BYGGLEK LEGO set fits within the box nicely and includes some nice LEGO-compatible studs that can be used in models. There is also enough space for digging through the pile of bricks to find what you need – within the box. The box itself can also be used as part of the models, of course. Unfortunately, the lid sits on top of the box – it doesn’t click securely. As such, I tend to use elastic bands to hold things together when I’m on the move. Not a great look – but it does the job.

Over to you!

I hope this post has been useful! Let me know what you think. I’d also love to hear if anyone else has used the IKEA + LEGO combination for LEGO Serious Play ????

Pre-sunset at the end of the day

The magic start date – plus or minus 2 days

Earlier this month I reflected on leaving the thirdspace. This post continues my reflections on this transition.

The start date for my new position is technically the 1st of October, in two days’ time. Despite that, I’ve already dipped my toe into the School of Education’s conference, moved office, spent whole days in my new building and attended meetings. This all took place thanks to my internal move, allowing me a smoother transition instead of dropping into the deep end. However, while that magic start date is coming up, it actually felt like the real start was two days ago as this was my first teaching. Hopefully, the +2 or -2 makes sense now 😅. It still kind of feels weird blogging about the build-up to a starting point that has already kind of happened (in reality) – but hasn’t (contractually) at the same time.

Earlier this week I blogged ahead of my first teaching sessions. Today I have the benefit of reflecting on this experience.

Workshop time: A day without slides

My first two sessions this week were both workshops. This gave me a full two hours with my L7 workshop group and another two hours with my L6 students. These sessions were entirely activity-based, requiring me to teach through facilitation. There were no slides or detailed plans, just the knowledge in the room: both mine and my students. This felt novel. Refreshing even. It is fair to say, however, that as an outgoing Learning Developer, this shouldn’t be the case… What happened to my Learning Development practice and signature pedagogies?

Massification of Learning Development

A decade ago, when I first started as a Learning Developer, it was all about high-quality, one-to-one appointments and small group-based workshops to facilitate learning. Somewhere over the years, as demand for the service grew and as the resources in our team changed, this support model changed. Appointments were still important, but those small workshops had rapidly turned into lecture-like sessions. While it was never by design, this model kind of crept up on us.

The development of Learning Development

For my old role, the Learning Development workshops were 90 minutes long and delivered in two parts. First, we used to intentionally ‘lecture’ students for 30 minutes, and then our volunteers facilitated activities for the following 60 minutes. This model was based on Peer-Assisted Study Sessions (PASS), and it worked really well. This approach helped us to support large levels of demand and maintain high-quality provision. Statistically speaking, the impact of this on reach was HUGE – but, unfortunately, this model failed when we struggled to recruit volunteers. This needed to be addressed and to maintain the service level and include more students, much of our provision moved online (well before Covid-19).

With the move online, we also recognised that 90-minute online sessions were unattractive – and so reduced the sessions to 60 minutes. In parallel to this, the most significant area of our service rapidly became in-curriculum teaching. With guaranteed reach and high capacity, this model also favoured lectures (all be it interactive). Again, from a reach, supply and demand perspective, this was a no-brainer. However, it also reflects the transition from workshop to lecture. Although this transition in pedagogy was never intentional, it worked – and still remains the best approach to meet demand.

As a Learning Development team, we long desired to bring back interactive workshops or introduce small-group teaching. However, it was a hard sell – even to ourselves. Given the pressure on our time and the demand for the service, it was hard to justify anything that might reduce capacity. I know this is not reflective of all Learning Developers and Learning Development Teams – but I also think it is common. It can be challenging to argue a different path when that can reduce capacity.

What does this all mean for this week..?

Back to this week’s teaching

It might feel like this post went a bit off-topic – but bare with me. As I alluded to above, the exciting thing about these first sessions I delivered as a lecturer is that the workshops were activity-based. Don’t get me wrong – I will also deliver lectures – but the most substantive part of my teaching will involve workshops similar to this. Obviously, this approach is not new to me, but it has been a while. I hadn’t realised how much I missed this approach until this week. It feels like I’ve left the thirdspace only to rediscover one of the signatures of my old practice. It’s been exhilarating to be facilitating once again. Delivering so much content without the structure of slides made this all intellectually stimulating.

Workshops in practice

My first workshop focused on supporting L7 students with understanding research. It was based on three questions, and I intentionally made no detailed plans as we were expecting late arrivals. This means that I had no idea if I would have three people in the room, or 30. The lack of detailed plans allowed me to be flexible with what I delivered, and I rocked up with flipcharts and marker pens as I think they allow a lot of options. After introductions, I asked students to share what they already knew about research and get it all down on flipchart paper. This was to reassure everyone that they had a starting point of pre-existing knowledge, and it also allowed everyone the opportunity to get to know each other. The two hours sped past and were over before we knew it. It felt dynamic, engaging and student centred. It feels like a while since I’ve been able to deliver content like this!

This opportunity continued into the afternoon with my L6 session. We were discussing research philosophy and positionality – which worked perfectly as a dynamic session. Everyone placed themselves on a spectrum of positivism to interpretivism and then mapped their own positionality. The discussion and debate in this session were outstanding, and I got some great feedback from the students. It was freeing to be delivering this type of session again, and I look forward to more of this next week.

Final thoughts

The best thing about both workshops is that I will see the same group of students next week. I mentioned this in my last post, but it remains nice to think that we can build upon what we started this week. I also believe that as we get to know each other more, the co-learning and knowledge construction will no doubt grow. I think this is important for educational research as we bring part of ourselves into research. This means discussing ourselves. Anyone undertaking such research needs to be a reflexive, self-aware and critical practitioner. Talking about ourselves is always easier with people we know.

Why I don’t like Gibbs’ Reflective Cycle in reflective practice

Reflective practice

Reflective practice is a core tenet of many professions. From nursing to teaching – reflective practice is an aspect of qualification, a requirement of professional bodies and an accepted aspect of practice. Reflective practice requires an individual to engage in conscious thought about an experience, event or practice. Such thinking should be critical; considering both what has worked and what has not. The aim of such reflective thinking is to identify what went well so that you can keep doing it – and what hasn’t worked well so you can change it. In short, reflection should be a useful tool for future action. Reflection also requires some form of expression – from writing in a personal diary or keeping notes on your practice to having a conversation with peers or writing a formal essay. Reflection needs communicating – even if it is only for your own use.

Three stages of reflection for reflective practice:
1 - have an experience
2 - think about an experience
3 - put learning into practice

While there are many different academic models of reflection, they usually revolve around three core components: an experience, thinking about an experience and then putting that learning into practice. Popular models include Kolb, Gibbs, Schön, Rolfe et al., ERA and Brookfield. As a learning developer, I see these models used frequently in student work. There is, however, one model I see more than any: Gibbs‘ Reflective Cycle – and I’m sick of it.


Gibbs’ Reflective Cycle

Before I start the critique, I should first say that Gibbs’ model has its uses. The rigid structure serves some students well, setting out how their essays should look. Instead of fretting over planning, this is largely set out in Gibbs’ model.

Another advantage is that it annexes descriptions into a single section. While this can cause other problems, it at least contextualises the role of description in the rest of the piece – it is a small aspect. I also like how Gibbs’ refers to feelings as a distinct aspect. Feelings are often overlooked and their prominence in the Reflective Cycle is helpful at framing reflection as different from normal discursive academic writing.

Describe what happened briefly. Feelings - Describe feelings/emotional response. Evaluation - What was good/bad about response. Analysis - How do you make sense of it? (use research). Conclusions - General conclusions. Specific conclusions - Action Plan What would you do next time?
Gibbs’ Reflective Cycle (Image from University of Hull, 2021)

Criticisms of Gibbs’ Reflective Cycle

Having given Gibbs some form of an introduction, this section briefly lists the issues:

  1. The Reflective Cycle is boring – The six-stage model leaves little breathing room for interpretation or expansion. It produces essays that are samey.
  2. The Reflective Cycle determines paragraphs – Most implementations of Gibbs’ model force students into a single paragraph per stage of the model. This doesn’t scale well as essay lengths increase, leading to too much description and feelings. It also does not provide much freedom on how different elements of a reflection are structured.
  3. The Reflective Cycle can lead to superficial reflections – This is because Gibbs does not require the writer to challenge values or assumptions associated with any of their actions in the experience.
  4. The Reflective Cycle fails to draw connections – Without linking the experience being reflected upon to other events, there is a missed opportunity to demonstrate depth.
  5. The Reflective Cycle focuses too much on the reflector – While reflection is a highly individualistic thing, most approaches to it consider there are others. However, Gibbs fails to move beyond analysis of self. This can make reflections self-serving as opposed to individually useful (and sometimes that means challenging!).
  6. The Reflective Cycle fails to pose probing questions – While deep, probing questions certainly can be associated with some of the aspects of Gibbs’ model, as presented in overview, these are lost. This, again, leads to superficial reflections.
  7. The Reflective Cycle fails to engage critical thinking – While the model has components of evaluation and analysis, these are simply defined. Evaluation and analysis should present an opportunity for critical thinking – but this is largely absent.
  8. The Reflective Cycle fails to contextualise – The distinct sections for description and feelings are set towards the front of an essay. This can makes it difficult to links between different aspects of evaluation and analysis with elements of description.
  9. The Reflective Cycle confuses novices – So many students struggle to differentiate the evaluation and analysis. This can lead to mixed up sections. I also don’t know if the analysis and evaluation are the right way round. Sometimes I’m in favour of swopping – and others in favour of the status quo.

These points demonstrate many of the weaknesses associated with Gibbs’ Reflective Cycle. I often find simpler models more effective as they give more freedom and space for tailoring to the task required.

Other options

When considering Gibbs, it is also useful to consider that other models are available. My favourites right now are:

Rofle

Rolfe et al’s (2001) framework focuses on three questions:

  • What?
  • So what?
  • Now what?

While this may seem simpler than Gibbs, I feel it allows more flexibility and adaptation. The three questions lead writers to consider a combination of description, links to theory and actions to take forward.

Brookfield

Brookfield’s (2005) four lenses encourage reflectors to consider an event from multiple perspectives

  • Lens of their own autobiography as teachers and learners
  • Lens of students’ eyes
  • Lens of colleagues experiences
  • Lens of educational literature

This directly addresses one of the critiques of Gibbs – that there is no consideration of others in depth.

LEGO Serious Play starter kit for research & teaching

LEGO Serious Play was an essential aspect of my research method, getting participants to ‘build’ their answer, not just talk it through. I’ve also used it as a teaching facilitation tool to support critical and divergent thinking. LEGO is one of my most favourite research and teaching methods, as you can let people work through answers with the use of LEGO, and then capture the salient points when they share their build. It not only saves a lot of data processing for the researcher, but it is a lot more fun for participants. For teaching, it supports different forms of thinking and really gets ALL students involved. While LEGO Serious Play is a distinct facilitation approach and you can get trained to use it, there are also some helpful books to get you started. I recommend Blair and Rillo’s SERIOUSWORK as a good place to start.

To use LEGO for any aspect of research or teaching, you first need to buy some! This blog highlights the choices I made to build my budget LEGO Serious Play kit.

LEGO Serious Play sets are awesome! But expensive. There is a range of sets available on the official LEGO shop, but they were beyond my budget as a self-funded doctoral student. I had to improvise. This article will introduce the sets I purchased and how I think they worked for research and teaching use.

My haul

The LEGO sets I purchased for my LEGO Serious Play kit

LEGO classic

LEGO Classic sets are a brilliant way to bulk out your LEGO Serious Play kit. You get a lot of brick for your money, and the variety of colours is fantastic. I’m so jealous of children today – LEGO had about five colours when I was a child. I already had a Large Creative Brick Box (10698) – so bought a couple more to serve as the baseline of my LEGO Serious Play kit. The plastic storage boxes they come in are also the perfect place to keep the LEGO stored away between uses. In addition to these larger sets, I also bought a couple more classic sets, one featuring lots of windows and doors (11004) – the other featuring lots of wheels (11014).

The available sets vary over time, but I have found they usually have a classic set on offer with extra wheels and another with windows and doors. These are useful additions to any LEGO Serious Play kit so I’d advise investing in such sets. Windows and doors are not only useful in a literal sense, but they work well for metaphors. Wheels work well for movement, vehicles and more. I’ve also seen a set with extra roof tiles which I think could be useful. It’ll certainly be part of my next LEGO purchase.

Interesting bricks

Next up I wanted to add a set with some different/interesting bricks. To be honest, any set would do for this – but I wanted to avoid anything licenced. I felt items like a Star Wars brick or a Spiderman Minifigure would not serve as universal references, so wanted to avoid them. I think Minecraft LEGO sets are particularly useful as they have lots of transparent tiles and colourful bricks. At the time I purchased my kit, LEGO was celebrating its 60 year anniversary and had launched some special Building Bigger Thinking sets. I purchased World Fun (10403), which contained some useful pieces like a treasure chest, eyes, columns, helicopter and a couple of Minifigures. I also chose Ocean’s Bottom (10404) which has more eyes, wings, wheels and transparent bricks.

All these LEGO classic sets built the bulk of my LEGO Serious Play kit. This gave me lots of standard bricks, including windows, doors, wheels and more. The next pieces I used to build my collection were all a matter of choice. For example, baseplates can be useful for a lot of LEGO Serious Play kits – but they were not something I needed for my particular research. As such, I decided to forego them. If you need to facilitate collaborative builds then baseplates are the perfect way to bring this together.

Pick a Brick

To top off my LEGO Serious Play kit, I wanted to choose a few additional bricks. To help with this, I used the Pick a Brick station at a LEGO store. I focused on extra eyes, small tile pieces and anything else small. This would allow participants to build intricate/small/detailed models – should they wish.

Minifigures

Minifigures can be a bit of a divisive topic when considering their use in LEGO Serious Play. They can lead participants to focus on people (which may not be a bad thing) when they’re building their answers. For my research, I felt participants would benefit from Minifigures. Libraries are inherently social spaces – and people are part of that. I didn’t want participants wasting time in my research sessions ‘building people’ – so Minifigures it was!

Again, I felt the best place to get these was through a LEGO shop. There are build-a-Minifigure stations in LEGO shops allowing you to build three custom figures per pack. Four packs (12 figures) covered my needs.

Preparing the LEGO

The worst thing you can do is walk into your first LEGO Serious Play research or teaching session with a load of new boxes of LEGO. It’s worth spending some time unboxing and unbagging it to ensure it is ready to use. I also spent time assembling a few elements to make them ready for use. For example, adding tyres to wheels, putting wheels on axels, putting panes in windows and adding doors to their frames. While participants are free to switch things around, it does mean the bricks are ready for use without needing to combine these pieces.

From the unboxing photo below, you can see there was a lot of plastic bags to ditch. I also wanted to find a way to layout the LEGO without getting it everywhere – so I used the cardboard box lids from printer paper boxes. It worked really well to stop LEGO falling all over the floor during my research sessions.

Ready to go!

With all the LEGO purchased, unpacked and ready to go, I was able to start using it for teaching and research purposes. I still keep the LEGO stored in the big yellow boxes that came with the larger sets. I also bring a load of those empty box lids to pour LEGO out and stop it from getting everywhere.

LEGO works as a wonderful research and educational tool. I took this snap from one of the first sessions I facilitated three years ago. I can’t wait to share some more of my reflections on this.

LEGO, the LEGO logo, and the Minifigure are trademarks and copyrights of the LEGO Group. ©2021 The LEGO Group.

Using LEGO as a teaching aid for academic writing at university

This post will introduce my approach to using LEGO to teach academic writing. I conduct a lot of personal appointments with foundation and undergraduate students. For some students, ordering their ideas and structuring them is a real challenge. This problem tends to stem from:

  • not knowing where to start,
  • a sense of being overwhelmed,
  • the volume of information they consult,
  • the volume of information they feel *needs* including in their assignment.

Further, it is not just a case of ordering ideas, but structuring them that can be problematic. I feel that a lot of the poorly structured essays that I see are failing at the paragraph level. This is a real issue for a lot of students, especially those with less writing experience, those who have taken a break from education, or those who have no experience of essay-style examination. The latter is particularly an issue for international students from countries with different approaches to higher education assessment, often focusing on examinations above coursework essays.

This post will detail how I’ve used LEGO to discuss some of these issues with students, and use it to help them outline their approach to academic writing. This starts with a student I saw a couple of weeks ago. I was struggling to communicate the structural elements of an essay to them. The student had lots of ideas, but simply did not know where to start and all the approaches in study skill books were simply not working for them. Instead of just rephrasing, I tried a different approach, running downstairs to grab my tub of LEGO. I think LEGO bricks are an excellent way to visualise some elements of academic writing and decided this was the perfect time to give it a go. I think this metaphor for academic writing structure can really help students struggling to structure their ideas – or more appropriately, to help students who are overwhelmed with their own ideas and sorting them out.

Let me know what you think by commenting below, or getting in touch via @LeeFallin. You can also find out which LEGO sets I’ve used to build my teaching and research kit.

Using LEGO as a metaphor for academic writing

When planning your essay, it can be really daunting. You end up with ideas all over the place:

LEGO bricks spread all over a table in no order

You need to order these ideas into groups. The act of doing this enables you to identify the major aspects of your essay. As expected, some ideas will be discarded at this phrase too (see the pile to the right side). It is still worth keeping a record of these as they may be useful at a later stage (who would EVER throw a LEGO brick in a bin!?!?!):

LEGO bricks grouped into piles of the same colour. Some to the right are discarded.

Once you have grouped all of your ideas like this, they form the basis of your overall argument. Each brick group is an aspect of this, forming one of the micro-arguments that lead your reader to the conclusion in your overall argument. These micro-arguments (brick groups) may by represented in an individual paragraph, or across a group of paragraphs. This process is not easy. At this idea stage, some of your groups will end up too large and you will need to break them up across two or more paragraphs. When this is the case, it is hard to distinguish which paragraph an idea belongs in. In reality, you are more likely to come across this problem later in writing when you have an oversized paragraph that you need to break up:

A pile of yellow LEGO bricks of subtlety different shades

When all the elements of your points, arguments or ideas are grouped into their individual paragraphs, they need further structuring:

A pile of brown bricks come together into a block

A solid paragraph should have a good structure. I recommend TEAL as a good starting point:

  • Topic – A brief introduction to what the paragraph is about. What is your point?
  • Evidence – Academic evidence, reflections, your own research/data
  • Analysis – The ‘so what’? Persuade the reader that your conclusion is the correct one
  • Link – Link this paragraph to the next – or to your overall argument.

(Indeed – this stage may be the *best* starting point for some students, but the route described so far is excellent for those who struggle to structure all their ideas in the planning phase)

TEAL is a good way to structure all those ideas into a coherent paragraph:

An assembled block of brown bricks

LEGO bricks are an excellent metaphor for how you need to link all these elements together. The bumps and they way they interlock with bricks above makes this point clear. Everything with a paragraph must coherently link together and make sense:

Photo of lego blocks - demonstrates the

Once you have your individual paragraphs, they need to be assembled in the right order. This is often done as you go along, but as you being to edit, you may realise they need re-ordering. It isn’t just the structure that may change, and as you edit, some smaller points may need removing as you further refine your ideas (and try to get under your word count):

A long block of assembled bricks. Colours are striped in groups to represent paragraphs.

All of these elements together can help you rule your own writing:

LEGO monarch with crown

Taking this into practice

To put this into practice, I often recommend students grab a stack of post-it notes or use a mindmap to get all of their ideas on the table. The principles above serve as a great framework from which to interpret all these ideas. Working from the ideation phase, grouping/sorting and refining the order and breaking it into paragraphs. If all else fails, literally using the LEGO bricks works well too. Small post-it notes can be used to adhere ideas to the bricks in a way that doesn’t require cleaning them afterwards. This works perfectly with Duplo too.

The model above is designed to help students identify their main points, group their ideas under these main points, and then divide those points into interlinked paragraphs. As the bricks represent, these all need ‘clicking together’ to form a stable essay (or stable LEGO model!). This may seem a little obvious for advanced writers, but it is certainly worth trying with those new to academic essay writing. As above, please let me know what you think! I should also note a quick thank you to my colleague Sue Watling. She indicated this approach was interesting when I mentioned it in conversation, so I figured it was worth expanding on my blog.


LEGO, the LEGO logo, and the Minifigure are trademarks and copyrights of the LEGO Group. ©2021 The LEGO Group.

The development of university teachers vs. the learning developer

Today I had the pleasure of starting my Postgraduate Certificate in Academic Practice (PCAP). As a learning developer, my journey is atypical to the peers on my course. This article serves as my first reflection about this. Our first reading was Kugel’s (2006) How professors develop as teachers. Kugel discusses a typical development pathway for lecturers — moving from an understanding of how to teach students towards an understanding of how to support their learning. In this, there are six stages, each characterised by the changing focus as lecturers develop their practice:

The transition from teaching to learning

This model was interesting. Kugel discussed how new teachers tend to focus on themselves as they begin to teach. They move towards solidifying their own discipline knowledge before starting to take into account students. These initial changes focus on teaching. The understanding of students develops, acknowledging them as receptive, then active learners. These later stages begin to focus on learning above teaching. Finally there is an understanding of learners as independent — with the core role of the teaching being to support students to teach themselves.

While I can see much in this model, it’s an interesting reflection for me as a learning developer.

The primary role of a learning developer is to help learners achieve that end goal — independence. While there are many nuances to this, ultimately learning developers are aim to work with students to help them develop their own autonomy and self-sufficiency. So… do learning developers really jump to the final stage of Kugel’s model?

Perhaps. At least at first. As a new practitioner starting in the learning development field 9 years ago, I feel I started from day 1 as a practitioner supporting this goal. Perhaps somewhat light in the tools I had at my disposal – but a focus on independent learning all the same. What I didn’t realise was that learning development itself had an underlying literature I needed to understand. As such, I perhaps worked backwards through some of Kugel’s model. I had to back-step and develop myself and my disciplinary knowledge to ultimately make me better at supporting that learning.

That backwards learning was important. It made me appreciate the diverse ways in which most academic tasks can be achieved. Without this understanding, there can be a focus on promoting your practices — or at least a narrow range. Inclusive higher education practices should never aim to reproduce yourself. More importantly, it required me to understand what teaching means, and how in reality, it wasn’t really that important in most learning development encounters. Indeed, it wasn’t even something I did that much. That brings me to my last reflection on this paper.

This final reflection relates to ‘teaching’ itself. The paper focused on teaching alone. However, as educations, we have more tools than teaching alone. As learning developers we are coaches. We are mentors. We are cheerleaders – and yes! Sometimes teachers. Yet, teaching isn’t everything. It is just part of the story.

Designing for Diverse Learners

This post will detail the Designing for Diverse Learners Project that I am undertaking with my colleague Sue Watling from Learning and Teaching Enhancement, University of Hull. This post is published on both of our blogs, and you can check out Sue’s blog Digital Academic.

The Home Office launched an excellent poster series to highlight practices for developing content for users falling into one of the following six categories:

  • low vision,
  • D/deaf and hard of hearing
  • Dyslexia,
  • motor disabilities,
  • users on the autistic spectrum,
  • users of screen readers (visual issues/blindness).

We we really impressed by these posters, but also overwhelmed with how we can support educators to use them in practice. For this reason, we worked to develop our Designing for Diverse Learners poster, combining the essential practices for all of the above. The aim of this document was not to target any one group of learners, but to develop an outline of practices that follow the principles of universal design where changes for some benefit the vast majority of learners.

The Poster: Designing for Diverse Learners

We have made this poster available in two formats, the image below and a printable PDF. For best results, print your poster on A3 paper (portrait orientation) and trim the white paper to the sides.

This poster outlines some best practice guidelines for learning design

Why ‘diverse learners’?

The idea of ‘diverse learners’ is really important to the both of us. The practices outlined in our poster will benefit every learner, not just those who many require specific adjustments. The reason we are able to do this is that in applying the principles from the above posters to the educational context, we are able to look at them for the specific purpose of designing digital learning materials and opportunities.

One of the reasons for our initial focus on digital resources is our institutional context at the University of Hull where the majority of resources will be access via the institutional VLE, Canvas. The University of Hull has a set of ‘expected use of Canvas’ criteria which include the following:

Staff should ensure that all digital content supporting learning and teaching e.g. text, images and multimedia, follows inclusive practice guidelines.

Our poster does not claim to support every single learner or requirement an educator may come across, but we are certain that resources developed along these principles will meet the vast majority of needs. We are also keen to frame this as a working document. We are keen to get as much feedback as we can to help us make this resource event better. We’ve already had some feedback about including some text line spacing and would welcome any further ideas you all have.

Future developments

As a community, we can continue to develop this resource and make it even better. We welcome input from both educators and learners as to how we can make this any better. We have set-up a Tricider to help collect feedback on the poster and to enable to community to vote on individual ideas. If you have not used Tricider before, it is very easy to contribute. Simple visit our Tricider and either ‘add an idea’ or vote on the ideas of others. You can also place comments on Tricider or use the comment area on this blog post if your prefer.